Jewelry Making Made Easy: Crafty Accessories to Create at Home

Jewelry making is an ancient craft that has endured and enchanted for centuries. The art of creating adornments by hand is a labor of love, offering a unique and personalized touch to any outfit. In today’s fast-paced world, where trends come and go in the blink of an eye, there’s something special about taking the time to craft your own accessories. It’s an enjoyable and therapeutic hobby that anyone can try, and the results are often stunning. The best part? You don’t need a professional studio or expensive equipment to get started – just a few basic tools and materials, and perhaps a creative spark of inspiration!

One of the great things about jewelry making is the range of creative techniques and materials you can explore. Whether you’re a beginner or a seasoned pro, there’s always something new to try. For instance, you could experiment with different types of beads, from delicate glass seed beads to colorful wooden beads, each offering a unique texture and visual appeal. Or, try your hand at wire wrapping, a technique that involves shaping wire into intricate patterns to create delicate pendants and earrings. If you’re feeling especially crafty, polymer clay jewelry is a fun way to bring your artistic vision to life, allowing you to sculpt and shape your own unique beads and pendants.

For a truly personalized touch, incorporating meaningful materials into your designs can make your creations all the more special. Perhaps you have a favorite stone that brings you good luck, or you want to upcycle a broken piece of family heirloom jewelry by giving it a modern twist. Working with precious metals like silver and gold is also an option, allowing you to create timeless and elegant pieces that can be passed down through generations. The possibilities are endless, and the satisfaction of wearing your own handcrafted jewelry is immeasurable.

If you’re just starting out, there are plenty of beginner-friendly projects to try. For example, creating a simple beaded bracelet or necklace is a great way to familiarize yourself with basic techniques and develop an understanding of color and pattern. As you become more confident, you can explore more complex designs and techniques, such as macramé, which involves intricate knotting to create beautiful textured pieces. There are countless online tutorials and step-by-step guides to support your jewelry-making journey, with a vibrant community of crafters sharing tips and inspiration.

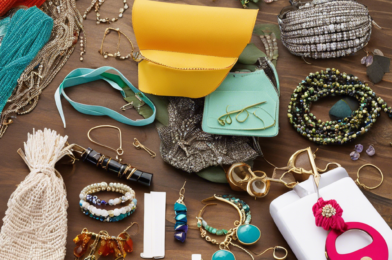
To get started, you’ll need a few basic tools and supplies. Round-nose pliers, flat-nose pliers, and wire cutters are essential for shaping and manipulating wire, while a ruler and a jewelry-making glue will ensure precise measurements and secure fastenings. A good workbench light is also invaluable, providing the illumination you need to work on the intricate details of your designs. In terms of materials, the sky’s the limit, but some popular options include beads, wire, chains, charms, and findings (the components used to assemble jewelry, like clasps and jump rings).

Craft stores and online retailers offer a treasure trove of supplies to explore, with a range of prices to suit any budget. As your skills progress, you can invest in more specialized tools and materials to expand your creative horizons. Jewelry making is a wonderful way to express your personal style and creativity, and it can also be a great side hustle or small business venture. Whether you’re crafting gifts for loved ones or building your own jewelry brand, the possibilities are endless once you master the basics. The sense of accomplishment that comes with wearing your own unique designs is truly empowering.

One of the most rewarding aspects of jewelry making is the ability to create pieces that truly reflect your individual style and personality. Perhaps you’re drawn to bold, statement-making pieces that turn heads, or you prefer delicate, understated designs that add a subtle touch of sparkle to your look. Whatever your taste, creating your own jewelry allows you to ensure that every piece you wear is a perfect reflection of you. It’s a wonderful feeling to know that you’re wearing something truly one-of-a-kind, and it’s a great conversation starter, too! Sharing your craft with others is all part of the joy of jewelry making.

Lastly, jewelry making is a wonderful hobby to explore, offering a creative outlet, a means of self-expression, and the satisfaction of wearing your own unique designs. It’s a relaxing and rewarding pastime that anyone can try, and with endless techniques and materials to explore, the possibilities for creativity are limitless. So, why not give it a go? Gather your tools, stock up on some sparkly supplies, and let your imagination run wild. You might just discover a hidden talent and a new favorite hobby! Happy crafting!

Feel free to let me know if you would like me to adjust or expand on any part of the article. I can also create a title for the piece if you would like.
Knitting for Beginners: Essential Tips and Simple Patterns

The world of knitting can be intimidating for beginners, but with the right tools and tips, anyone can master this fun and creative craft. Knitting has seen a resurgence in popularity in recent years, with people of all ages and backgrounds picking up their needles and creating beautiful, handcrafted items. If you’re a beginner knitter, here are some essential tips and simple patterns to get you started on your knitting journey.

First, let’s talk about needle size. When you’re starting out, it’s best to use a medium-sized needle, somewhere in the range of 6-8 mm. This size is easy to handle and allows you to create a variety of projects, from cozy scarves to stylish cowls. You’ll also want to choose the right type of yarn for your project. Yarn comes in a variety of weights and materials, so be sure to select one that is suitable for your skill level and the item you want to create. For beginners, a worsted-weight yarn in a light color is a good choice as it will show off your stitches and make it easier to identify and correct any mistakes.

Taking time to learn the basic stitches is key. The two most common stitches are the knit stitch and the purl stitch. Practice these stitches until you feel comfortable and confident, as they form the foundation for more advanced techniques. Don’t be afraid to start with a simple project, like a scarf, to build your skills. There are plenty of easy patterns available online that use only these basic stitches, and a scarf is a versatile accessory that will always be in style.

Another essential tip for beginners is to understand gauge and why it matters. Gauge refers to the number of stitches and rows per inch in your knitting, and it can vary depending on your tension and needle size. Getting the right gauge is important because it ensures that your project will turn out the correct size. Always take time to do a gauge swatch before starting a new project to save yourself headaches later on.

Crafting on a Budget: Affordable DIY Projects for Every Skill Level

Crafting is an enjoyable and rewarding hobby, but it can often be expensive. The good news is that there are plenty of affordable DIY projects that cater to all skill levels, allowing everyone to explore their creativity without breaking the bank. Whether you’re a beginner looking for a simple project or an experienced crafter seeking new challenges, there are numerous options to choose from.

One great aspect of crafting on a budget is upcycling. Transforming old or discarded items into something new and useful can be extremely satisfying. For example, you could take an old shirt and turn it into a stylish bag or use jars and bottles to create unique storage solutions for your crafting supplies. A quick look online will provide endless ideas and tutorials for upcycling projects, and you’ll be surprised at how much you can create from items you already own or can source cheaply from thrift stores or garage sales.

Another budget-friendly option is to explore paper crafts. All you need is a good quality paper, glue, and a pair of scissors, and you can create anything from cards and gift tags to intricate paper cut-outs and quilling designs. Paper crafting is incredibly versatile, and the only limit is your imagination. You can even incorporate other cheap or free materials such as leaves and flowers to add unique textures and natural colors to your projects.

If you’re looking for something a little more challenging, why not try your hand at woodworking? While this may seem like an expensive hobby, there are ways to keep costs down. For example, you can source scrap wood from construction sites or reclamation yards, or even use fallen branches from your yard to create one-of-a-kind pieces. With a little creativity and some basic tools, you can make anything from a simple coaster to a beautiful piece of furniture.

For those who enjoy sewing, there are also many budget-friendly projects to explore. From repairing and altering old clothes to creating your own unique garments, sewing is a great way to express your personal style on a budget. Keep an eye out for cheap fabric remnants, and don’t be afraid to experiment with different textures and patterns to create something truly unique.

Whether you’re an expert or a novice, affordable DIY projects are a great way to explore your passions and develop new skills. So, what are you waiting for? It’s time to get crafting and discover the joy of creating something with your own two hands.

Remember, crafting on a budget is all about creativity and thinking outside the box. Don’t be afraid to experiment, and always keep an eye out for cheap or free materials that you can use. With a bit of imagination, the possibilities are endless! So, dive into the world of affordable DIY and unlock your creative potential without spending a fortune.

Scrapbooking 101: Preserving Memories with Creative Layouts

Scrapbooking has become an art form, allowing people to preserve their memories in a creative and personalized manner. With a plethora of options available, from decorative papers to embellishments, it can be a fun and addictive hobby. But where do you start, and how can you ensure your creations stand the test of time?

Firstly, invest in quality supplies. Acid-free and lignin-free papers are essential to ensure your photos and memorabilia remain intact. Archival-quality adhesives and pens will also prevent yellowing and disintegration over time. A good-quality album with PVC-free pockets will protect your layouts and provide a beautiful way to display your creations.

The key to a stunning layout is balance. Consider the rule of thirds when placing photos and embellishments. Odd numbers of decorative elements tend to be more visually appealing, so cluster items in threes or fives. Leave some negative space to allow the eye to rest and to avoid a cluttered look.

Adding dimension to your pages can make them more intriguing. Use foam tape or dots to raise certain elements, creating a sense of depth. Embossing powders and dimensional magic are also great ways to add texture and interest. Just be mindful that overly bulky pages may not lie flat in your album.

When it comes to photographs, vary the sizes and shapes to create visual appeal. Don’t be afraid to crop or edit your photos to focus on the key subjects or moments. You can also use photo-editing software to add filters or effects that complement your color scheme.

Embellishments are the fun part! From buttons and badges to ribbons and stickers, the options are endless. Again, odd numbers and varied shapes will create interest. Remember, you can also make your own embellishments by cutting shapes or words from patterned paper or card. This is a great way to ensure your creations are unique.

Finally, don’t forget the journaling. The stories and memories behind the photos are what make your scrapbook precious. Be sure to include dates, locations, and the names of people featured. You may think you’ll remember these details, but time has a way of fading memories. Your future self will thank you for taking the time to record these precious moments in words as well as pictures.

With these tips in mind, you’re ready to start preserving your memories in style. Let your creativity flow, and enjoy the process of crafting beautiful layouts that will be treasured for years to come. Happy scrapbooking!

The Art of Pottery: Hand-Building Techniques for Ceramics at Home

The ancient art of pottery has seen a resurgence in recent years, with more people looking to try their hand at crafting ceramics. Hand-building is a traditional technique that doesn’t require a pottery wheel and is perfect for beginners and experienced potters alike. It’s a therapeutic process that allows you to create functional or decorative pieces that are truly unique.

The beauty of hand-building is its accessibility. With just a few simple tools and materials, you can start crafting at home. All you need is clay, a work surface, and some basic tools like a rolling pin, clay cutter, and molding tools. It’s a satisfyingly tactile process that connects you with the earth and your creative side. Many find working with clay to be a soothing and meditative experience.

One of the most popular hand-building techniques is pinch potting, where you start with a ball of clay and use your fingers to pinch and shape it into a vessel. It’s a great way to get a feel for the clay and create organic, free-flowing forms. Slab-building is another common technique, involving rolling out sheets of clay and then cutting and assembling them to create more structured forms like boxes, plates, and vases.

Coiling is an ancient technique that involves building up the form by rolling out long snakes of clay and then stacking and smoothing them together. This method is excellent for creating more substantial pieces, and it’s a fun process that can be quite addictive. For those who want to add texture and detail to their work, there’s also the option of using molds or stamps to impress designs into the clay.

The decoration is another exciting aspect of hand-building ceramics. Using slips, underglazes, and glazes, you can add color and design to your creations. Whether you’re going for a minimalist aesthetic or something more whimsical, the possibilities are endless. Many people also enjoy adding texture through carving or embossing, creating a tactile and visual experience.

Firing is an essential step in the process, and there are a few options for home potters. Many use a kiln to fire their pieces, which can be electric or gas-powered. However, you can also explore alternative firing methods like raku, saggar, or even pit firing for a more rustic and unpredictable result. These techniques offer a unique and exciting way to add character to your creations.

Finally, there’s the satisfaction of knowing that you’ve created something beautiful and functional with your own two hands. Hand-built ceramics make wonderful gifts, and many people even turn their hobby into a small business. So, whether you’re looking for a new creative outlet or wanting to reconnect with a traditional craft, hand-building ceramics at home is an incredibly rewarding pursuit.

Mastering Macramé: A Beginner’s Guide to Knotted Plant Hangers

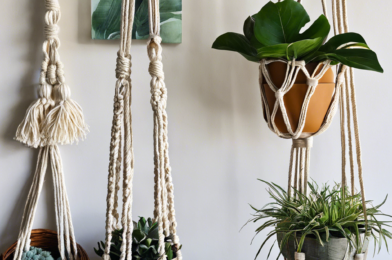
Macramé, the ancient art of knot-tying, is experiencing a modern renaissance, and it’s easy to see why. With its intricate patterns and textured designs, macramé adds a unique and handmade touch to any home. And it’s not just for wall hangings and tapestries anymore – plant hangers are the latest trend taking the craft world by storm.

Creating knotted plant hangers may seem daunting at first, but with the right tools, techniques, and a bit of practice, anyone can master this timeless art form. This beginner’s guide will take you through the tools you’ll need, the basic knots that form the foundation of macramé, and simple step-by-step instructions to create your very own knotted plant hanger.

Let’s start with the tools and materials you’ll need to get started. The great news is that macramé requires very few materials, and most of them are easily accessible and affordable. The most important tool is, of course, your cord. For plant hangers, it is best to use a natural fiber cord like cotton or jute, which is both durable and aesthetically pleasing. You’ll want to choose a cord thickness that is comfortable to work with and suits the size of your project. Typically, cord sizes range from 3mm to 6mm for plant hangers.

In addition to the cord, you’ll need a pair of sharp scissors to cut the cord and a tape measure to ensure your hanger is the correct size. Optionally, you may want to invest in a macramé board, which is a helpful tool for keeping your work-in-progress secure and at the right tension. While not necessary, it can make the process easier, especially for beginners.

Now, let’s move on to the basic knots that form the foundation of macramé plant hangers: the square knot and the gathering knot. The square knot is a simple knot that creates a flat, woven pattern. To create this knot, you’ll need four cords, divided into two pairs. Cross the right pair over the left, and then bring the left pair over and under the right pair, creating a twist. Pull the cords tight, and you’ve made your first square knot!

The gathering knot is used to bring cords together and create a secure hold. To form this knot, lay one cord on top of the other, bringing the working end under and then back over the standing end. Pull tight, and you’ve formed a half-hitch. Repeat this process, creating multiple half-hitches in a row, and you’ve formed the gathering knot.

Now that you know the basic knots, you can start creating your own plant hanger. Start by cutting your cord to the desired length, allowing for a few extra inches for knots and adjustments. Then, take four cords and secure them to your macramé board or a fixed object. You will create the base of your plant hanger using the gathering knot.

Once you have a secure base, divide your cords into pairs and start adding square knots. Build up a pattern of square knots, leaving a small space between each one. You can create interesting designs by varying the number of square knots in each section and leaving larger or smaller spaces between them. This will form the main body of your plant hanger.

Continue knotting until you’ve reached your desired length, and then finish off with another gathering knot to create a secure loop for your plant pot to sit in. And there you have it – your very own knotted plant hanger!

DIY Decor Ideas: 10 Crafty Ways to Spruce Up Your Home

Sprucing up your living space can be a fun and creative endeavor, and with a few simple DIY projects, you can transform your house into a home that reflects your unique style. So, roll up your sleeves and get ready to unleash your inner craft enthusiast!

One of the easiest ways to add a pop of personality to any room is with a fresh coat of paint. Go bold with a vibrant accent wall or opt for a subtle, neutral tone to create a calming atmosphere. Wallpaper is also making a comeback, offering endless patterns and textures to suit any taste. If you’re feeling extra crafty, try creating a feature wall using wood paneling or even fabric for a unique, textured look.

The devil is in the details, and this couldn’t be truer when it comes to home décor. Small accents like throw pillows, blankets, and rugs can make a big impact by adding color, texture, and comfort to any space. Try mixing and matching patterns and fabrics to create a cozy and inviting atmosphere.

Let there be light! Updating your lighting fixtures is an easy way to brighten up your space, both literally and aesthetically. Whether you opt for a sleek, modern design or a vintage-inspired piece, new lighting can completely transform the look and feel of a room. Don’t forget to play with scale and proportion to make a statement.

Create an art gallery in your home by displaying your favorite prints, paintings, or photographs. Gallery walls are a great way to showcase your personality and interests while adding visual interest to your space. If you’re feeling creative, try making your own art using canvas and paint or experiment with digital design for a more contemporary look.

Bring the outdoors in with houseplants! Greenery adds life and color to any room while helping to purify the air. Whether you opt for low-maintenance succulents or dramatic fiddle leaf figs, houseplants are an easy and affordable way to decorate. If you don’t have a green thumb, consider investing in high-quality artificial plants that look remarkably real.

These ideas are just the tip of the DIY décor iceberg! With a bit of creativity and some elbow grease, the possibilities are endless for crafting a space that you’ll love calling home. So, which project will you tackle first?

Now, let’s move on to a few more unique ideas to really showcase your creativity and add that ‘wow’ factor to your space. First up, try your hand at upcycling. Transform old furniture or décor pieces into something new and exciting. A fresh coat of paint or a creative repurposing can give new life to thrifted finds or hand-me-downs.

Another fun idea is to create a unique headboard for your bedroom. This can be done by simply painting a design directly onto the wall or by crafting a statement piece using wood, fabric, or even vintage doors! It’s a great way to showcase your personal style and add a touch of luxury to your sleeping space.

If you’re feeling extra adventurous, why not experiment with ceiling decor? From pressed metal tiles to colorful paints and even hanging installations, there are many ways to draw the eye upward and add a unique design element to your room. This is a less explored avenue of interior design that can really make your home stand out.

Lastly, don’t forget the power of the perfect finishing touch. Embellish your décor with unique elements that showcase your personality. For example, add a stylish slide-on to your stair railing or attach decorative hinges to your cabinet doors for an unexpected design detail. These small touches can make a big impact and truly complete the look of your space.

With these ideas in mind, you’re well on your way to becoming the ultimate DIY decorator, and your home is sure to become the envy of all your friends! Happy crafting!